Saturday, 22 June 2019

Front Axle Part 6 - Finally getting to the Hub of the matter...

I finally managed to find some time to make some progress on the actually build last weekend with the re-assembly and fitment of the front hubs.

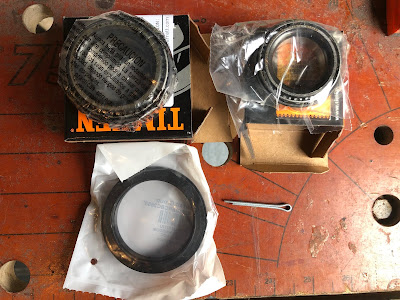
I'd previously placed another order with SNG Barratt for the service parts needed as shown below.


Contents of Wheel Bearing Kit from SNG

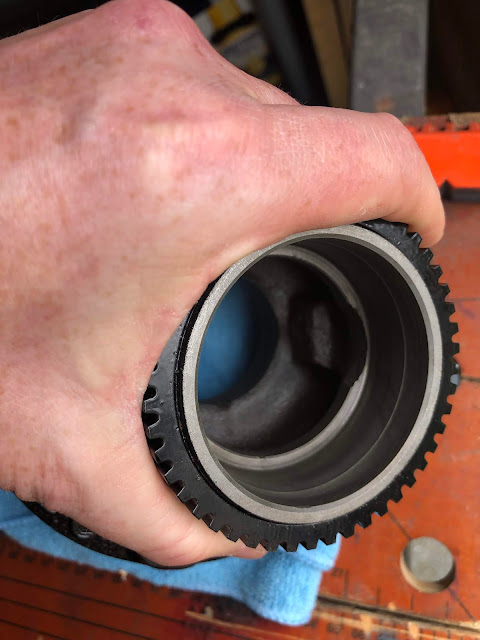
Prior to attempting to install the new bearings I gave the hubs a final clean out to get rid of any final remnants of sand from the blasting prior to powder coating.  I read on the internet about masking off bearing recesses etc when sand blasting to avoid any contamination with blasting media.  Unfortunately I read that after I had sand blasted my hubs......And sure enough there were some traces of sand clinging to the cast areas in the middle of the hubs.  A final clean-out with some cotton buds soaked in WD40 and a blow out with the airgun and I think (hope) I managed to remove all traces of grit / sand that might lead to a very short bearing life!!


Cleaned out and grit free....(fingers crossed)

I recycled the old bearing races to use a drifts to assist in installing the new races.  Firstly I cut a slot in the old races using an angle grinder with a cutting disk so that the old races wouldn't get stuck in the bearing recesses - the slot allows the old race to be compressed slightly so it can be pulled out easily.


Old bearing races modified to assist with installation of new races

It was then a simple task of seating the new races into their respective housings and using the old race and a large hammer to gently tap the races into the hub until they were fully seated.


Inboard race prior to any gentle tapping....

Modified bearing drift...
Finally got the boy off the X-box to help out!

Inboard race fully installed and seated...
....followed by outboard bearing race.

With races installed it's time to get greasy!  Armed with a tub of high performance bearing grease and a large box of disposable gloves I set about packing the central part of the wheel hubs between the two bearing races with grease making sure I got plenty of grease in and any large air pockets out! 

Grease - does exactly what it says on the tin....

Having formed a large grease "dam" behind the bearing races, I packed the inboard roller bearings with grease, making sure to get all the spaces in the bearing cage as full of grease as I could manage.  The inboard bearings are then placed in their bearing races and the outer grease seals pressed into place (I used a large block of wood and the large hammer to press the seals in fully).

Hub cavity packed with grease

Inboard bearing cage greased and in place

The stub axle on the front uprights then got a generous coating of grease as well and then the hubs can be slid onto the stub axles.

A well lubricated shaft........(sorry...)

The outboard bearings were then packed with grease as above and pushed into their bearing races.  The D-washers from the original donor car were then placed over the end of the stub axle and a new locknut screwed onto the end.


Outboard bearing race inserted in place

D-washer and lock nut in place

The recommended procedure is then to tighten the locknut to 16Nm / 12 ft-lbs to seat the hub onto the stub axle and then while rotating the hub assembly in the forward direction tighten further to 27Nm / 20 ft-lbs.  The locknut is then slackened off half a turn and then retightened hand tight only.  The assembly was finished off with a new locknut retainer and split pin.

All torqued up with new nut retainer and lockpin installed

That's the front end finished for the moment, pending installation of the brakes.  Time for some rear end action now!


Completed hub assembly

Saturday, 1 June 2019

Stoneleigh Kit Car Show - 2019

My son and I  took a quick trip up to Stoneleigh for the National Kit Car Show over the first May bank holiday weekend.

The last year seems to have zipped by; at last year's show we were still doing research before buying our cobra kit and now we are on the early stages of the build.

The show was much busier than last year and it was good to see the AK stand getting lots of visitors!

The main purpose of the visit was to get some thoughts and ideas around future details of the build; colours, dashboard layouts, lights, wheels etc etc.

Unfortunately the visit opened up some very clear differences between my son and I!  I am tending towards quick-lift jacks rather than over-riders, he is thinking full bumpers and over-riders.  I wanted a classic wooden steering wheel, he wants a modern black wheel.  I was thinking classic gauges in the cockpit, he found some horrible digital colour changing gauges (no way!).

It's a good job we have plenty of time before having to make some of these choices!!!!


Lights....modern?...

...or classic P700 style...?


Classic oxblood cockpit...

Nice grey leather cockpit...

Or black...?  (No wooden steering wheels in sight!!)

We also had a good wander through the trade stands and picked up some essentials including some abrasive disks, a new set of automatic wire-strippers, a new sign for the garage, some more powder-coating powder and a TIG welder.  OK the TIG welder wasn't an essential but I am a sucker for a bargain and it was a show special, half price at £100!


Retail therapy....

Of course the welder turned out to maybe not such a bargain after all and when I got it home and opened it up it has a strange blue plug on the end of the power lead.  Apparently they don't fit a standard 13A socket......and it requires a 32A supply.....and my garage only has a 16A supply.......

Oh well - time to call the electrician!!

Can't get that into a normal socket!!!


Monday, 13 May 2019

Front Axle Part 5 - Front Hub Refurb

In between the fun and games of assembling the front suspension, I have been pressing on with cleaning up the front hubs ready for reassembly.

First step was a good clean-up with a nylon brush and a bucket of Gunk degreaser to remove all the loose crud and old grease from inside the hubs.


Step 1 - Degreasing

This was given a rinse off with water, dried off with a towel and then to prevent any (further) flash rusting of the machined surfaces, I put the hubs in the oven for 30mins to dry off any last traces of water.


Dinner doesn't look very appetising....

I then set to work with a variety of steel wire brushes in a rotary drill.  I bought a couple of twist knotted steel wire brushes from Screwfix which were very effective at removing a lot of the surface rust.

HEALTH AND SAFETY TIP 1 - again an obvious one, but when using wire brushes in power tools, always ensure the work piece is secured in a vice or work bench and keep two hands on the power tool (especially if the trigger lock is on).  If you hold the work piece with one hand, there is a danger that the brush can snag on part of the work piece and kick back onto the hand holding the piece.  I was wearing gloves but the twisted knot brush still managed to give the end of my thumb a good stinging!


Steel Brush 1 - Glove 0

After a good session with the wire brushes, the hubs had cleaned up quite nicely.


After wire brushing

There was still quite a lot of rust engrained in the cast surface, especially on the back face of the hub, so I broke out the Budget Blaster and spent a couple more hours cleaning up the hubs.  Have to say I was very happy with the results.


Blasted vs Brushed

Unfortunately I left the hubs for a couple of weeks between sand blasting and coating and when I went back to them a fair amount of surface rust had reappeared.  I assume there must be some salt residue in the sand I used for the cleaning process that reacted with the freshly cleaned metal surface which caused this (I have other parts that have been cleaned up / polished with wire brush and flap wheels alone that have not shown any further signs of rusting over the same period).  Still another going over with the wire brush and another couple of hours on the sand blaster got them back to their prior glory!

HEALTH AND SAFETY TIP 2 - never ignore your previous health and safety advice.  Rather stupidly I did the same thing again but this time was not so lucky with the wire brush catching on my glove and running up my arm until it found some bare skin to abrade....


Come back - its only a flesh wound..!!

Having re-cleaned both the hubs it was time to have a go at powder coating them!

For cast parts, particularly cast iron and aluminium parts, it is recommended to preheat the parts prior to coating to "outgas" or "degas" them.  The cast surface  can trap contaminants which, when heated, "outgas" and can cause porosity problems or lack of adhesion to coatings.

Firstly I masked off all the bits of the hub that I did not want to coat using high temperature masking tape.  The hub was then suspended from the oven shelf from my "specialist powder coating oven" using stainless steel wire wrapped around a couple of the wheel studs and secured with a couple of old nuts.

Masking Tape Applied...
Suspended from oven shelf (Note Project Powdercoating Stand in use)

The hubs were then put in the oven at around 230 degrees C for 30-40 mins before being removed and allowed to cool.  I then gave the hubs a good clean with Eastwood PrePrep to remove any last traces of grease and contaminants, gave them a final wipeover with a tack-rag and let them dry for few minutes.

Then it was time to powder coat!

The oven was preheated to 230 degrees C.  I hooked the powder coating gun up to my compressor, with the regulator set to around 6-7psi at free flow.  The ground clip from the powder coating gun was clipped to the hub and I attached a pot of gloss black powder to the gun.

As it was quite a still day, I risked attempting to coat the hubs outside.  Generally this worked OK, although the powder is very fine and even the slightest breeze would make coating very difficult.  The theory is that the powder coating gun kit provides a static charge to the powder within the gun with the effect that the charged powder is attracted to the grounded part that you are coating.

Theory seemed to be correct and I managed to coat most of hub quite quickly with a good covering of powder.  It can be difficult to get powder into intricate shapes and recesses due to something called the Faraday Cage effect (one for the electro physicists reading....) which causes some issues with the charged powder getting into these areas.  I had a couple of issues particularly with the ABS ring on the rear of the hub and some of the areas on the rear of the wheel studs.  I managed to get powder onto these by removing the deflector from the end of the gun and "misting" the area at a slightly lower air pressure.

Powder coated and ready for curing..

With the hub coated it was time to gently place it into the oven (without knocking any of the powder off) to be cured.  Once hub was in oven the temperature was turned down to 200 degrees C (which is the curing temperature for the gloss black I was using - different powders have different curing temperatures and times).

As the part starts to heat up, the powder starts to flow out - that is you can start to see it changing from the matt powder to a glossy finish.  After the powder has flowed out across the whole part, that is the point at which the curing time is started.

The hubs being quite a large and heavy part took quite some time to heat up to the point where the powder had glossed over everywhere - around 30 minutes.  This was not helped by the oven that I have bought only having the option to use the top heating element or the bottom element individually and not both at the same time - hence when using the top element (as I was), the top surface of the hub had started to flow out, well before the bottom surface had.


Top of hub has started to flow out (glossy) while bottom is still slightly matt

When the powder had flowed out across the whole hub, the timer was set for 20 minutes after which it was removed from the oven and left to cool


Freshly cooked hub....

Once the hub had fully cooled, I unhooked it from the oven shelf and removed all traces of the masking tape.  To prevent any further rusting before fitting the hubs to the stub axles, I gave all the exposed metal surfaces a wipe with some WD40 which will hopefully protect them.

Have to say I am actually pretty pleased with the results.  


Back face of powder coated hub....

....and the front face


Saturday, 20 April 2019

Christmas Holiday Projects - Powder Coating Stand


I have decided to try DIY powder coating the various donor parts that I will be re-using.  My plan is to buy the Eastwood Hotcoat Dual Voltage powder coat gun from Frost Restorations (although at time of writing it is still out of stock).

When watching the Eastwood powder coating guide on YouTube they used a cunning stand to clamp an oven shelf (with parts to be coated hung from the shelf) allowing easy transfer into the curing oven.


Powder Coating Stand - photo courtesy of Eastwood.com

Allows transfer of oven shelf and parts directly into
oven for curing - photo courtesy of Eastwood.com

I thought it was be a good project to try and make my own stand as it would allow me to brush up (learn!) on some of my metal working skills prior to using them in anger on the Cobra build.

I bought the main metal sections, 3 No 1m lengths of 25mm box section, a 1m length of 50mm by 3mm angle section and a 1m length of 25mm by 3mm plate from Ebay, some M8 roofing bolts from Toolstation and some M8 Thumbwheels and 25mm square inserts from Ross Castors.


Selection of steel sections

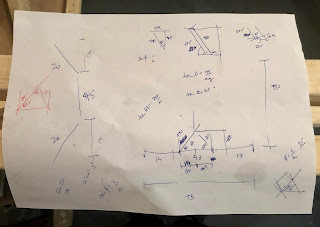
I used the proverbial back of a fag-packet to work out dimensions, angles and hole positions, testing my memory of trigonometry to the full!


Detailed Engineering Fabrication Drawing....

I cut the steel sections to the required lengths / angles using a Rage Evolution Mitre Saw.  I have used the saw many times previously for timber but this was the first time I had tested it out on metal.  Have to say it cut through the various steel sections very easily and with nice clean cuts.  Usual H&S rules apply - cutting metal does result in lots of tiny shards of metal being flung everywhere - wear eye protection and gloves (and I spent the next week picking small bits of metal out of my coat and jeans!!!).


Sections cut to length - starting to take shape!

One of the main reasons I decided to have a go at this project was so that I could have a go at MIG welding.  I bought a MIG welder years ago when I was thinking of attempting some body repairs on my Trans Am but never actually got round to using it!

I have a Siegen Mini-Mig 130 (which is a cheap Sealey brand).  Its quite a small output welder and does not have a fully adjustable power level (2 switches giving four power levels (Min I / Min II / Max I / Max II)).  As I bought it with the intention of only welding thin body panels I wasn't that bothered about a higher power machine at the time.


It was a bargain 10 years ago....

I did the obligatory self-learning MIG welding course by watching a number of videos on YouTube and feeling confident headed to the garage to set up the welder and hope, that after 10 years of gathering dust in my garage, it actually worked!

I had some old lengths of 5mm steel plate lurking in my garage and used a couple of these to practice laying down a decent weld bead.  Well the good news was that the welder worked.  The bad news is that welding is not as easy as it looks!  Lots of sparks and spatter but not a lot of weld!  Eventually I concluded that the lower power settings were a waste of time, and after a bit of twiddling with the wire speed control knob and experimenting with the angle of the welding torch I finally managed to produce something that looked like a reasonable bead of weld.  Time to start welding up my project!

I started by trying to weld an end cap on the bottom of one of the box sections. I cut a square section of plate and tack welded it in place.  So far so good.  However the first attempts to weld along the joins were disastrous.  The results were back to being blobby and splattery even though I had not changed the settings on the welder.


End cap tack welded in place

I thought I had solved the issue when I realised that I had run out of gas!  I was only using a small disposable Argon / CO2 gas cylinder and clearly my extensive test welding had exhausted the supply.  However even after buying a couple of new cylinders, I still could not get a decent weld; still blobby and grinding down the weld revealed holes and poor penetration.  


Not the best advert for welding...

I pressed on, welding and grinding and rewelding and regrinding until I was happy enough with the end result (which used another whole bottle of gas to weld on two end caps!!!!)


After extensive welding and grinding....

It was then that I realised that I had got a slight twist in the cable leading to the welding torch which was enough to cause the wire feed to be a bit erratic.  Once I untwisted the torch, weld quality suddenly improved - this is a relative statement, the results were far from what I would call good, but a definite improvement!  A lesson learned - keep the cable from the welder to the torch as straight as possible!

Next step was to drill the holes in the bottom of the main section, the bottom brace and the bottom legs so that I could get the position of the plates either side of the bottom brace in the correct place.  Using my precise engineering drawing (?!) I marked the hole locations with a metal scribe and centre punch.  I drilled 4mm pilot holes and then opened out to 6mm and then to 8mm.


Drilling....

Drilled....

Final steps were to weld two sections either side of the bottom brace, to weld up both of the bottom legs and the weld the angle section onto the top of the main leg.  Although my welding was still a little untidy, once ground down the joints all looked pretty solid.


Plates welded either side of bottom brace
Bottom Legs welded together

Almost looks like a stand!

I tack welded a couple of nuts onto the bottom brace and onto the top shelf bracket then gave everything a wipe down with white spirit and sprayed it all with 3 coats of Hammerite Smooth.

I am actually pretty chuffed with the result - looks just like it was supposed to (which is always a bonus!!) and the thumbwheels and end caps add a nice professional looking touch (just don't look too closely at the welding).