Sunday 17 March 2019

Sand Blasting on a Budget

After derusting and a good session with a wire brush, my first batch of donor parts are looking pretty clean and shiny.  There are however, some traces of the old coating remaining in some of the recesses and within the rough surface of some of the cast parts.

Time to break out the sand blaster.  Oh wait - I don't have a sand blaster.  

Again  the internet is a wonderful place and after some research I found plans for a DIY sand blaster.  Actually I found several plans for full blown blasting cabinets, which was not really what I wanted.  I needed sand blasting on a budget!

First thing on the shopping list was a cheap air gun; this one was less than a tenner on Amazon.


Unfortunately this air gun came with a male 1/4inch BSP outlet.  The thread into the gun is actually smaller than 1/4inch so I couldn't just remove it and screw in a male 1/4inch airline connector.  No I needed to buy a whip hose (another tenner - budget blown!) with a 1/4inch female connector at one end and a quick release male connector at the other.


Thread in airgun is smaller than 1/4inch BSP....
....requiring purchase of an additional whip hose

Then it was time for a drink.  Actually I just needed the bottle and it needed to be one of the ones made of slightly harder plastic than your average drinks bottle.  This Greggs orange juice bottle fitted the bill perfectly, although I did also need to purchase a southern fried chicken baguette and a couple of steak bakes to go with the drink......

One bottle - empty and washed!!

First thing to do was to mark a section on the top of the 100mm long nozzle, roughly in the middle of the bottle opening.


Then with a dremel and cutting disk, I carefully cut through the top of the tube just enough to make an opening in the tube.


Next step was to remove the retaining ring off the bottle lid with a pair of cutters and then to drill a hole through the top of the bottle just big enough to pass the nozzle through with a bit of interference fit.


Then it was simply a matter of screwing the nozzle back onto the air gun, filling the bottle with sand (I used kiln dried paving sand), putting the lid on and hooking it up to the air compressor.

I used a plastic crate as a make-shift blasting cabinet (mainly I thought to prevent covering my driveway with sand), set the air regulator to 100psi and pulled the trigger.....

Surprisingly it did actually work.  Although the first attempt did attempt did result in a small sand storm blasting back of the plastic crate and abrading any part of my exposed skin it could find!

HEALTH AND SAFETY TIP - when sand blasting make sure you wear gloves and eye protection.  The sand goes everywhere and at 100psi makes short work of removing skin!  I also found it necessary to wrap a scarf round my face and do my best Bedouin impression to avoid lasting damage to my mediocre good looks.


Grab your blasters!

The eagle eyed among you will note that the picture above is actually of Sand Blaster Mk2.  The opening I cut into the nozzle of Mk 1 was too large for the kiln dried sand which was so fine it just poured out of the nozzle when angled downwards.  So I used the 200mm nozzle from the air gun kit and cut a much smaller slot.  I will keep Mk1 and maybe try it with some proper blasting media (either grit or walnut shells) which may be slightly coarser.

Mk2 - smaller opening in nozzle tube

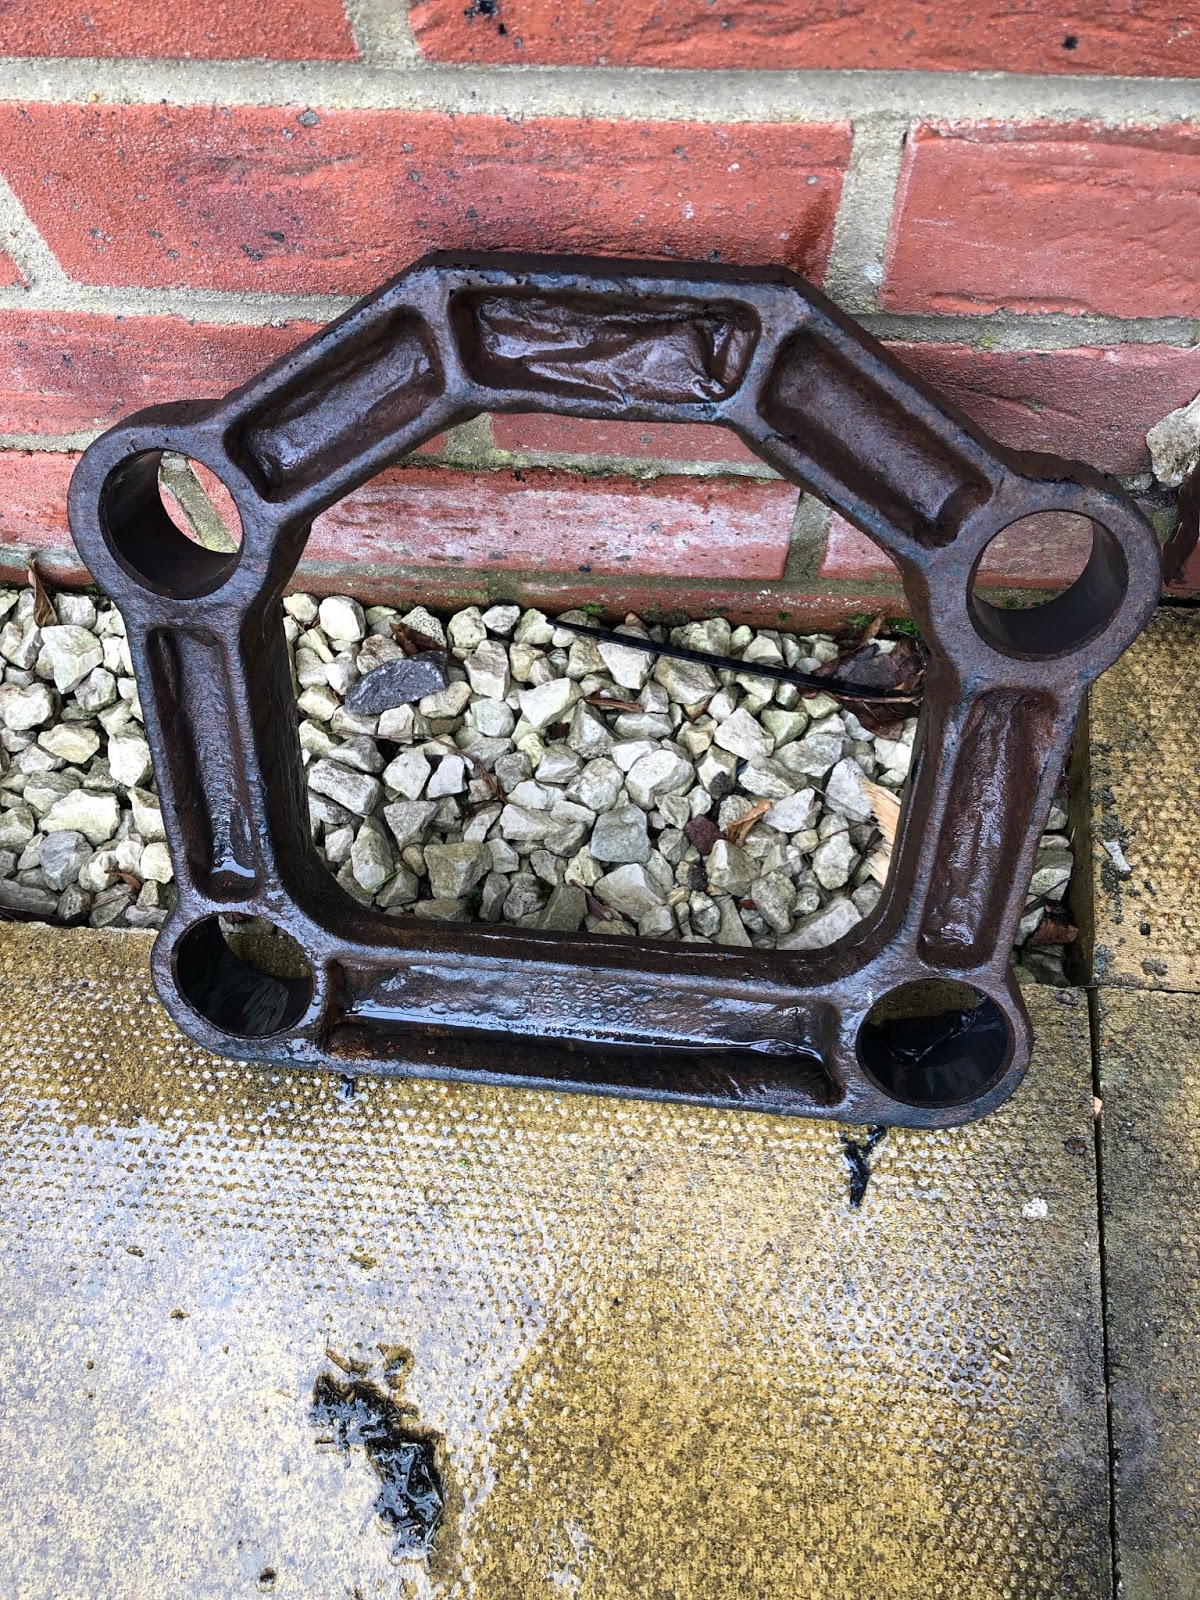
The blaster is actually quite effective and removed all traces of remaining paint off the wishbone tie.  Its obviously not as effective as a proper sand blaster and it took a bit of time (not helped by needing to stop every now and then to allow my 2hp compressor to try and keep up!!) but for a budget sand blaster I think its a tick in the box!

All traces of paint around bushes and in corners of
recess removed with Blaster Mk 2!

I still had to sweep up all the sand off the drive though....

Saturday 16 March 2019

Project Snake hits 1000 views!!

I've now had over 1000 views on this blog!

80% of the views have been from the UK, but Project Snake has reached Ireland, South Africa, United States, Australia, France, Belgium, Sweden and Switzerland as well.

Thank you to all who have viewed the blog.  I'd really like to get some feedback and hear from anybody who is in the process of building their own car (whether it is an AK or another manufacturer).  If you have your own blogs, on-line build diaries etc please send me details - I'm really interested in other peoples tips and build experiences.

As I have said before I hope my blog is of some interest and would really like to get some feedback - feel free to comment or send me an email.

In the meantime I hope you all keep coming back and thanks for looking!!

Friday 8 March 2019

Rear Axle Strip Down - Part 6

I have to admit trying to get this last taper bearing out of the rear hubs is seriously starting to get on my..........

Further internet research suggested welding a plate onto the front of the bearing which would a) allow the use of a straight drift to drive the bearing out from behind (rather than using an angled implement to try and get into the slots behind the bearing) and b) the weld apparently acts to shrink the bearing slightly making it easier to drive out.

Deciding to give this method a try, I purchased some a 300mm length of 20mm by 5mm steel strip and a 200mm length of 20mm did steel bar from eBay.  


Using one of the taper bearing races that I had managed to extract as a template, I cut a length of the steel plate and ground down the ends to fit inside the bearing race (including chamfering the ends to account for the taper).

Marked up.....
Cut.....
Grinding....

Final Result

I decided to tack weld the steel bar onto the back of the plate to make a more solid piece to be able to hopefully hammer the bearing out so I also chamfered the bottom of the bar slightly to facilitate tack welding.

Ready for welding...

Plate tacked onto bar...

I then attempted to weld the plate into the offending bearing race.  This proved to be more difficult than I thought.  Not sure whether it is because the race is hardened steel or that my welder is not powerful enough (or both), but the first few attempts to weld the plate in resulted in a lot of weld being deposited on the plate and very little on the bearing race.  I had to try several times, grinding off the weld deposit from my make-shift drift and rewelding.  Eventually I managed to get a welded connection of some sorts between the plate and the bearing race.  

Not pretty....

So armed with my trusty lump hammer it was time to get this bearing race out. Placing the hub on the ground and gave the protruding bar a couple of heavy duty blows.  Eventually I was rewarded by the bar shifting and I turned the hub over expecting to finally see some movement of the bearing race.

Not a chance - unfortunately all I had achieved was to crack the welds between the plate and the race (demonstrating that my welding had achieved zero penetration into the hardened steel race).  

I tried a couple more times to weld the plate in again but the result was the same each time - my welder could just not get enough heat into the bearing to get any weld penetration and after a few blows with the hammer, my home-made drift simply parted company with the bearing.

I gave Ben at Simply Performance a call and he acknowledged that these bearings can sometimes be a complete pain to remove.  His suggestion was to heat the rear hub up and then dunk it into an oil bath, to repeat this a few times and then to try drifting the bearing out. 

Determined to not let this bearing beat me I was all for giving this method a go, but when I was up at AK before Christmas I mentioned my dilemma to Jon who recommended just running a really hot bead of weld around the bearing to shrink it (as per my original thought) and offered to help me out if I brought my hub in.

So a couple of weeks back I drove up to AK with my hub and in less than 5 minutes Jon had welded round the bearing (with a welder about 10 times the size of mine) and drifted it out with ease!!!  I didn't even have time for a cup of tea before I was back out of the factory!!!!

I reckon I must have put at least 10-12 hours of effort into shifting that bearing (probably more).  It just shows that having the right gear can make such a difference.  In fact the difference in welding power between my hobby welder and the AK industrial welder was clear when Jon handed the hub back to me and it was so hot I could barely hold it!!

So the bearing is out and I think that completes the strip-down of the rear end. (I still have to drill out the brake shield retaining screws from when I sheared the heads off - but I'll deal with that as part of the rebuild).

Finally - last taper bearing removed.
Happy Days!!!


Saturday 2 March 2019

Who ya gonna call - Rustbusters!

I am very behind where I had hoped to be in terms of donor part preparation.

The chassis and body kit have been delivered but, although I have stripped down both the front and rear axles (except for my saga with the rear hub taper bearing), I have not degreased, de-rusted or re-painted any of the parts.

My previous experience with working on cars has told me that there is no miracle when it comes to removal of rust.  It comes down to elbow grease and plenty of wire brushing (unless one has one's own sand blasting cabinet - which unfortunately I don't!).

I am also not a fan of the various rust encapsulation products that are available (POR-15 and the like).  While many people swear by them, again my experience has taught me that the only way to prevent rust from coming back is to remove it completely before attempting any painting or coating.

That said, while I was looking through the various auto restoration catalogues that I have, plus some internet / forum browsing, there do seem to be products available that do 'what they say on the tin' and remove rust.  One that caught my attention was Bilt Hamber deox-C.  This is mentioned on many of the automotive forums, generally in positive terms, plus it was also used with great success and recommended by my fellow local builder, Richard.

Photo courtesy of Bilthamber.com


"deox-C is a crystalline, 100% active corrosion removal product formulated for the removal of corrosion products from steel, stainless steel and most ferrous materials. This product when dissolved in tap water, produces a bath of powerful rust removing liquid."

All sounds very good.  The only downside I could see was the price, as 4kg of deox-C runs at a shade under £50 and I figured I was going to need a fair amount to immerse all my bits.  So embracing my wife's new fiscal strategy, I continued to look for cheaper solutions (no pun intended!).

Further internet browsing revealed that the primary active ingredient in deox-C is citric acid.  The science bit goes along the lines of:

Citric Acid + Rust = Iron Oxide + Carbon Monoxide + Water + Hydrogen

Or for those of us who did chemistry at school many years ago....

C6H8O7 + Fe2O3 = 2 FeO + 6 CO + 2 H2O + 2 H2

However the really important bit for me was that I could pick up 5kg of Citric Acid plus a small aquarium heater (rust removal process works best if solution is maintained at around 20degC) from amazon for £20!

Rust busting on the cheap..!!

So armed with a large plastic bucket, I made up an approximately 10% solution of citric acid by dissolving 2kg of the crystals to around 18 litres of hot tap water.  I added the aquarium heater (I used a 50W heater) set to around 24degC and my rust removal bath was ready!

Ready for a bath...

The first bits to be de-rusted were the rear pendulum bracket, the rear wishbone tie and the rear spacer tubes - these were all quite heavily corroded.  I just immersed them in the bath without any prior treatment - no washing or brushing - just straight in!  Surprising bubbles started forming on the surface of the metal very quickly and before long the solution was gently bubbling away!  I covered the top of the bucket with a foil lid and left it for a week for the magic to happen.

Its a kinda magic...!

A week later when I took the foil off the top of the bucket I was greeted with a delightful black swampy looking bucket.

One week later!

Then I set to work with a bucket of hot soapy water and various nylon, brass and steel brushes.  To say I was impressed would be an understatement.  All surface corrosion had been converted to a grey sludge which washed off quite easily giving clean metal underneath.  The solution also managed to loosen off most of the remaining paint on the parts which again brushed off with little effort.

Rear Pendulum - before...

On removal from the acid bath...

After a wash and brush up!

Rear wishbone ties and spacer tubes before...

Rear wishbone tie after wash and brush

I forgot to take any pictures of the spacer tubes after their initial clean but they had come up practically like new with just a couple of spots of corrosion left on them.  The eagle-eyed of you will also notice that the wishbone tie in the photo above is my original one (with the missing and irreplaceable bushes).  There is a reason for that - which I will come to in a future post.

After the initial clean of the parts there were still a few areas of corrosion left so I decided to give them a dunk for another week (plus I stuck in the front brake calliper carriers at this time for a soak as well).

WORD OF WARNING - it is possible to leave parts in the acid solution for too long.  Once there is no more rust for the solution to work on, it starts to etch the surface of the metal (causing microscopic pitting of the surface).  I read this on the internet after I had worked it out for myself.  After two weeks of immersion of the heavy cast pendulum bracket was unaffected, but the thinner metal brackets on the wishbone ties were showing some minor pitting and the spacer tubes, which after one week looked almost new, were extensively pitted. Nothing that a good wire brushing / flap wheel won't cure - but something to be aware of!

Etching of surface due to over immersion

A final wash and brush of all the other parts, plus a quick tidy up with a wire brush in my drill has left the first batch of parts looking nice and shiny and ready for re-painting / coating.  

After bathing for two weeks and a quick wash..
...followed by a quick wire brushing = shiny parts!

I have to say the results were far better than I was expecting and will be working my way through the rest of my rusty donor parts in the same manner.