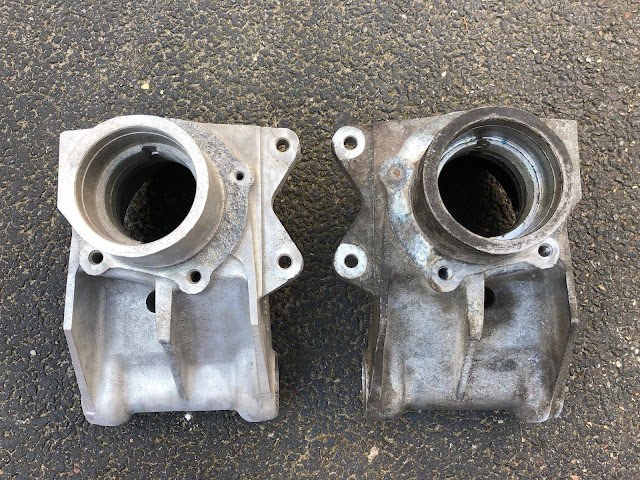
These are an aluminium casting and, after many years of service on the donor vehicle, were suffering from some heavy oxidation, particularly around the area where the steel brake back-plate sits, as well as having a good coating of general road grime.
The first step was to give the hubs a good soaking in a bucket of boiling water and some detergent - I used a couple of dishwasher tablets. Vigorous brushing with a stiff nylon brush shifted some of the grime.
 |
| One grimy rear hub ready for a bath... |
 |
| ...after a long hot soak and a bit of brushing |
Note it is not recommended to use steel or brass wire brushes on aluminium as particles of the wire can embed themselves into the soft surface of the aluminium which can lead to future rust staining in the case of the steel brushes and severe corrosion in the case of the brass brushes especially if exposed to road salt.
 |
| After initial cleaning - note heavy oxidation around brake back-plate mounting flange |
Next on the list of beauty treatments for the hubs was a session with the sandblaster. Actually quite a lot of sessions. Over many weekends...
The sandblasting gave reasonable but variable results. Some areas cleaned up quite nicely - generally the flat areas. The blasting removed the white aluminium oxide corrosion around the back-plate flange. However, under the oxidisation the surface was quite pitted and, despite trying different media, the sandblasting did not remove all the of the oxidisation. The resulting finish still had quite a lot of black oxidised aluminium in amongst the shinier areas. This was the same case for some of the edges and recesses within the casting.
 |
| Hub after sandblasting - some areas of ingrained oxidisation remain... |
 |
| The rear side of the hub - it was tricky to get sandblaster nozzle into the bottoms of all the recesses |
 |
| Oxidisation still present in areas of pitted aluminium |
The next treatment involved a liberal dousing with Frost Ali-Clean and a vigorous brushing with an old toothbrush.
 |
| Time for another scrubbing... |
I have to say I was quite disappointed with the Ali-Clean. It is supposed to be used on unpolished aluminium castings to clean and etch the surface. Having applied the product as per the instructions and rinsed off with water, I'm not sure I noticed any difference in the finish. The aluminium surface was no brighter and the areas of deep black oxidisation still remained.
This left me resorting to the electric drill and a brass wire brush (totally ignoring my own recommendation above....).
 |
| Recommendations?....more like guidelines... |
This treatment did improve the finish slightly - but still did not remove all the areas of black ingrained oxidisation. I even tried a further treatment of Ali-Clean (and I was still unimpressed...).
 |
| A before and after comparison - front side.... |
 |
| ...and rear side. |
When you look at the before and after photos, the cleaned hub does look significantly better than the 'before' version. But I thought there was still room for a lot of improvement.
Given that to get to this stage had probably taken me about 5 or 6 weekends and I had only 'cleaned' one hub, I came to the conclusion I needed a Plan B.
Plan B involved a trip to see the professionals, in this case, a local sandblaster in Braughing, RFI Screening. They offered to vapour blast both hubs for the princely sum of £20 each. In hindsight, I should have just taken this approach in the first place. The results from RFI are amazing and I could have saved myself a lot of effort.
 |
| Hubs - straight back from the sandblasters... |
 |
| ...vapour blasting leaves a clean satin finish... |
 |
| ...even recesses on the rear are nice and clean. |


