Wednesday 23 June 2021

Rear Axle Reassembly - Part 6 - Drive Shafts

 With the rear wishbones installed, the last thing needed before the rear hub carriers can be installed and the rear axle set-up completed, is to assemble the drive shafts.

AK provide shortened driveshafts as part of the kit.  These need to be mated to the donor splined axle shaft and differential connection plate using new universal joints to complete the drive shaft assembly.

Shortened Drive Shaft - spot the join!


I ordered the replacement universal joints from SNG as per the part numbers below.  The end bearing cups need to be removed from the spider for installation, with care taken not to disturb the needle roller bearings in the cups.  Prior to assembling anything I put a generous smear of copper grease on all the openings in the various components.


Replacement UJ Kit Contents

Bearing Cup Removed - take care not to disturb the needle rollers


My hydraulic press was buried behind several boxes of Cobra parts so I was originally intending to be a bit lazy and follow the AK method of using a vice to assemble the UJs.  However, the initial attempt to wind the first bearing cap into one side of the diff connection plate using the vice resulted in the cap getting slightly misaligned and jammed; I wasn't happy with hammering on the vice lever to force the cap into place so I resorted to clearing the garage up to give access to my press.

I also found that the AK method of pressing one bearing cap into place first, and then inserting the spider didn't work.  Maybe I pushed the cap in slightly too far but there seemed insufficient space to work the spider into the partially inserted bearing cap and the other side of the connection plate.  The solution was to hold the spider in place while the first bearing cap was pressed into place, turn the plate over and press the other side bearing cap fully into place (i.e. so that the circlip groove was visible) and the first circlip could be inserted.  Then the piece was turned over again, and the initial bearing cap pressed in sufficiently to allow the second circlip to be inserted.

Holding spider in place...

...first bearing cap is pressed into place.

Bearing cap pressed in flush with outside of diff plate

Other side bearing cap pressed in fully and circlip installed


TOP TIP - make sure that when you install the spider, that, having installed the grease nipple, it is facing towards the half shaft.  This makes access for greasing of the nipple once it is installed far easier.  Once again you may ask me how I know this (although its not a disaster if the nipples end up facing the other way).

New grease nipple installed and facing towards driveshaft...


This process is then repeated to connect the diff plate to the new shortened AK half shaft; the diff plate / spider assembly is held in place while the first bearing cup is pressed into the half shaft until flush.  Then the assembly is turned over and the second bearing cup pressed fully into place in the half shaft and circlip installed.  Then the first cup is pressed fully in and its circlip installed.

The whole process was then repeated to attach the splined axle shaft to the half shaft.

First bearing cup pressed in to connect diff plate to half shaft

Rinse and repeat for the splined axle end...

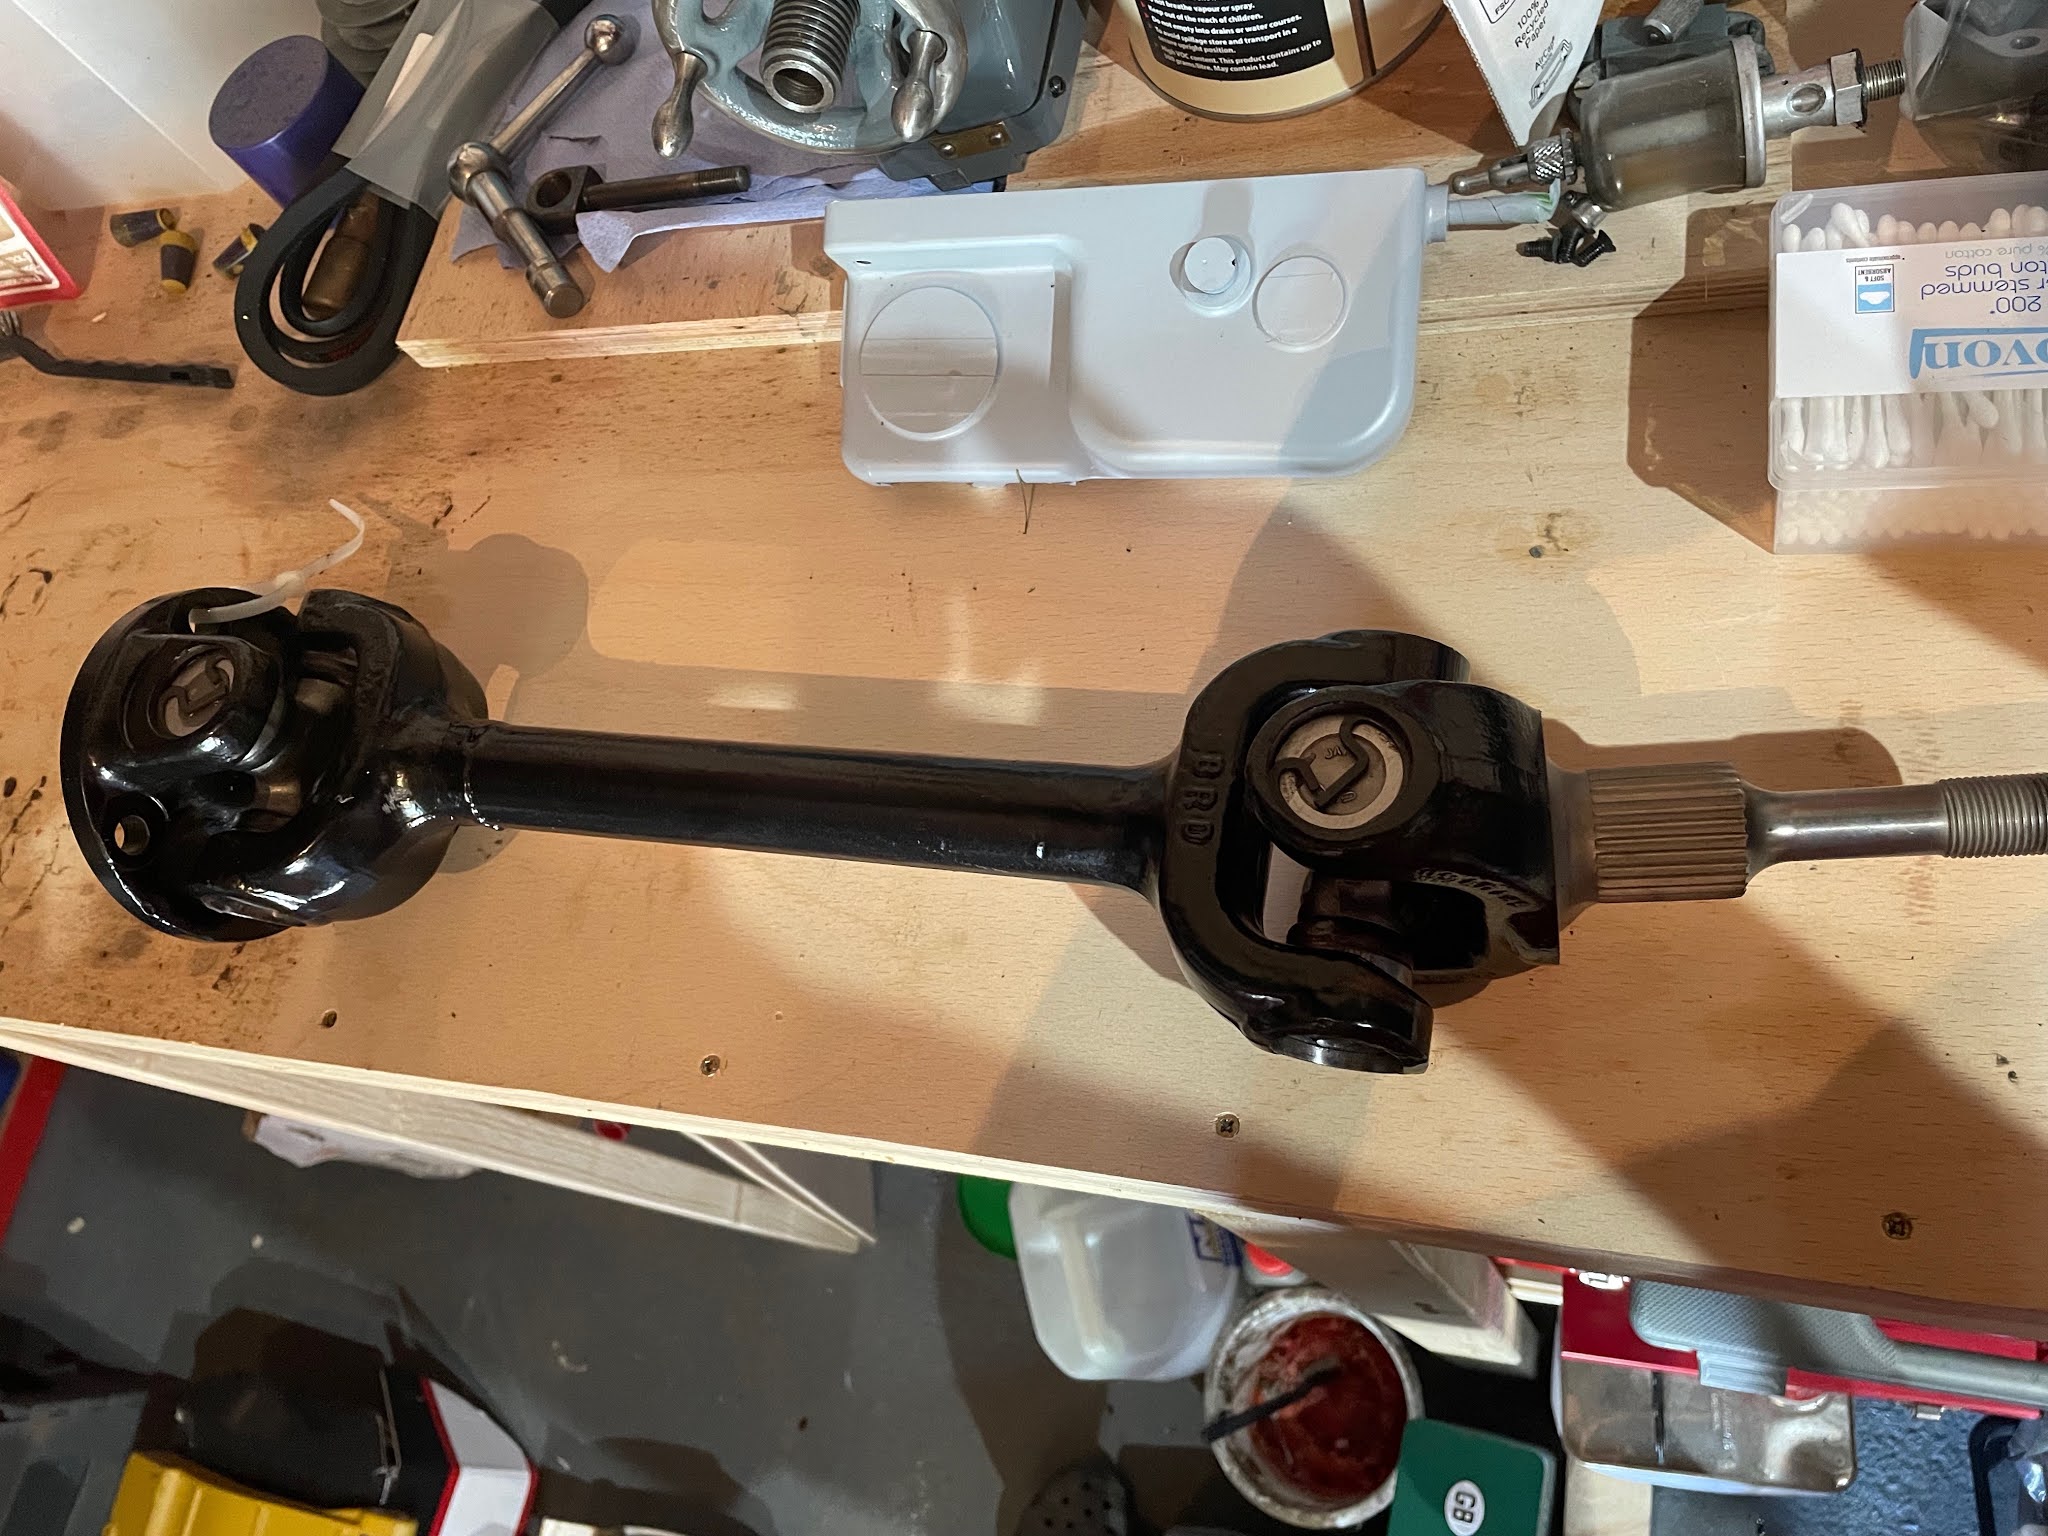
...and one completed drive shaft!

I have no intention of having to disassemble the drive shafts ever again, but should that need ever arise, I put a smear of copper grease around all the circlips to give them a bit of added protection against the elements and possibly give a fighting chance of easy removal at some point in the (distant) future.

I also greased up the universal joints with a grease gun filled with a lithium based bearing grease, pumping the grease in until it was just starting to seep out of all the rubber seals of the UJ bearing cups.

And with that, reassembly of the drive shafts is complete!

Friday 4 June 2021

Rear Axle Reassembly - Part 4 - Grease is the Word..!

So with all the bearing races installed into the rear hubs, the hub pre-load checked, and the correct spacers ordered, now I can crack on with greasing the bearings and finally re-building the hubs, yes?

Actually, yes I can!

Installing the hub bearings is very straightforward and exactly as per the AK Build Manual.

A generous smear of grease applied to the outer race

Grease vigorously massaged into the outer race

Even more grease smeared onto front face of bearing

The outer oil seal was then tapped into place

It's pretty much the same for the inner bearing, remembering to include the fixed spacer and the correctly sized 3.02mm adjustable spacer.

3.02mm Spacer freshly delivered from SNG Barratt

Inner bearing packed with grease and inserted in place with extra grease!

Tapping inner oil seal into place completes the job!

Next up is to install the new fulcrum bearings and new pivot pin sleeves.  On the original Jaguar set up the fulcrum pivot pin has an eccentric head which engages in a machined groove in the rear wishbone and, depending on the rotation of the bolt head, moves the bottom of the rear hub in or out to set the rear toe-in. This arrangement is dispensed with in the AK set-up.  

However there is still a need to install spacers between the fulcrum bearings and the rear wishbone.  The AK Build Manual simply states to reinstall with the original spacers from the donor vehicle. All well and good unless, like me, you somehow threw away / lost some of the original spacers when disassembling the rear axle.

All is not lost as you can buy new spacers easily from SNG Barratt or other Jaguar parts suppliers.  But, like the rear hub spacer, they come in a variety of thicknesses.  Further internet investigation revealed that the rear fulcrum bearings also need to be installed with a certain amount of pre-load.  Except that I could find no explanation for setting this up on the later X300 suspension.

I found a few descriptions on various Jaguar forums on how to set the pre-load, but this only seemed relevant to the earlier type hub carriers, which seem to have a two-piece pivot pin sleeve where the spacers are fitted between the two halves of the sleeve.  So effectively this adjusts the overall length of the pivot sleeve and hence the distance between the two fulcrum bearings to set the pre-load / tolerance.

I couldn't see a way to apply this method to the later style of hub carrier.  The Jaguar X300 Service Manual is not much help either.  While it describes the method for determining the pre-load in the main hub bearings very clearly, for the fulcrum bearings it simply says "install equal sized shims to give 0.003in, (0.0762mm) pre-load".  It doesn't say how or where....

So I dropped Jon at AK Sportscars a message on this matter.  His response was basically not to worry about the preload and just to tighten the outer pivot bolt up enough to pull the ends of the wishbone against the hub carrier.  So with that cleared up, I could press on with installing the new fulcrum bearings.

The fulcrum bearings have an integral oil seal

Bearing given a generous packing with grease

The fulcrum pivot sleeve sits within a void in the hub carrier.  I gave the outside of the sleeve a generous coating with grease to try and delay the onset of any corrosion.  I did see a suggestion on one of the Jag forums where someone had drilled a hole from the bottom of the hub carrier into the void and inserted a grease nipple to allow grease to be pumped into the void and allow the fulcrum bearings to be kept topped up, which seemed like quite a good idea.  Maybe something I might consider doing in the future.

A light smear of grease on the outside of the pivot sleeve..!

Pivot sleeve inserted into place...

...and fulcrum bearing tapped gently into place

The hub carrier was turned over and the second fulcrum bearing greased and tapped into place in a similar fashion. 

Job done!

With bearings reinstalled in both hubs, the next step is to reinstall the drive hub and ABS ring.  But first the handbrake backing plate needs to be installed.