This was a simple matter of removing each of the wishbone shafts in turn, being very careful not to dislodge the wishbone and washers. I then stuffed a goodly amount of copper grease into the front end of each wishbone and applied an equally liberal coating of copper grease to each of the wishbone shafts. I then re-installed the shafts, which pushed the plug of copper grease through to the rear of each wishbone (hopefully aiding to ensure the full length of the wishbone and chassis tube is greased up). The excess grease was removed with a wad of paper towel.
 |
| Copper Grease "Plug" at front of Wishbone |
 |
| A generously lubricated shaft.....(minds out of the gutter please....) |
For the lower wishbone shafts, I purchased some additional M22 washers from Westfield Fasteners to put under the bolt head to accommodate for the slight extra length of the shaft. I also wasn't happy with the way the M14 castellated nut sat on the end of the inner sleeve of the lower wishbone bushing, so I also bought some extra M14 washers for the nut end of the shaft.
With all four shafts, greased, reinstalled and nuts tightened up hand tight, it was time to install the front shock absorbers.
As it seems to be with this Cobra building adventure, not all tasks are as simple as they should be. I started by test fitting the 7/16" by 2.5" front shock bolts (supplied by AK) in each of the holes. All were fine, except for the nearside lower shock mounting, which would not pass through the bushing which is pre-installed in the lower wishbone. Closer inspection revealed that the inner sleeve of the bushing was slightly out of round at the front (the end was also a bit ragged which I was not altogether happy with either).
 |
| Slightly flattened lower shock mounting bushing |
I decided to try and ream the inner bushing out with an 11mm drill bit, which appeared to be a great idea, until about the last mm of travel on the bit, which caught on the end of the inner sleeve and tore it out of the rubber completely!
B*gger......!
 |
| Unintentionally Disassembled Front Shock Bushing... |
However this unintended action did reveal that the inner sleeve did not look in very good shape at all; not only was the front edge all ragged but it looked a bit distorted / crushed in the middle.
A quick email to AK and Jon offered to press in a new bushing for me - this did mean that I had to remove my newly installed lower wishbone from the chassis, but that's why I hadn't fully tightened up any of the nuts yet wasn't it?
A quick trip up to AK, a cup of tea and a chat with Jon later, and I was returning home with a new bushing installed.
 |
| New (better looking) lower shock bushing courtesy of AK |
Then it was a simple matter of applying copper grease liberally to the bushings and the shock mounting bolts and installing shocks on both sides.
 |
| Off-side front Shock installed |
Final job was to tighten up all the bolts to the recommended torque settings (as per the Haynes Manual for the Jaguar XJ40). For information, these are as follows:
I was unable to get a socket and my torque wrench onto the lower balljoint stud nuts, so I just tightened these as much as I could by hand using a spanner.
Also with the lower wishbone pivot nuts, I ended up torquing these to around the correct value but then had to back them off slightly to be able to fit the split pin through the castellated nut and hole in the shaft.
 |
| Lower Front Wishbone Shaft - Retaining Pin inserted and secured |
I also found when tightening the upper shock bolts that the bolt head was starting to cause the powerboat underneath it to crack slightly. AK only provide a single washer per bolt (which I had put on the nut end) so I bought some additional 7/16" washers for the bolt ends and re-installed and re-torqued bolts to specification.
As each bolt is torqued down, I consider it good practice to mark it in some way. I did this using a small blob of nail varnish on the bolt and nut. I spent many happy hours in the local chemist perusing the shades before I settled on Danny Boy Blue.....
 |
| Other shades are available.... |
IMPORTANT NOTE
I have not been carrying out the assembly of the front suspension in exactly the same order as the AK build manual, mainly because I am not yet ready to install the front hubs and I have yet to refurbish my front brake callipers.
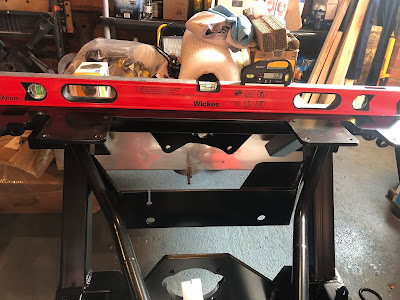
This does mean that I missed out a key stage prior to installing the shock absorbers which is to set the front camber angles (i.e the angle between the vertical axis and the steering axis when viewed from the front of the car). The AK Gen III wishbone have elongated holes in the upper wishbone ball joint mounting for this adjustment. However the camber is measured by checking the vertical angle of the brake disk with the wishbones set horizontally.
Now I had remembered that I needed to set the camber angle, hence I have not yet fully tightened the upper ball joint mounting bolts. However, in order to get the wishbones horizontal when I get round to installing the brake disks, I will have to undo and remove the shock absorbers again......
 |
| Now its starting to look like a proper car!!!! |


