Still I did manage to find some time to get a few of the donor parts powder coated ready to compete the front end build and commence fitting of the differential unit.
First part to be coated was the second front hub. This was tackled in exactly the same manner as the first hub (Front Axle Part 5 - Front Hub Refurb), although the overall process went much quicker second time round now that I had a better idea of what I was doing! As with the first hub, I needed to spend a couple of hours reblasting and cleaning up the hub to remove the flash rust that had formed after the first clean. Thankfully this process was achieved without further personal injury!
 |
| Second hub coated in glossy black |
Now I could turn my attention to some of the parts to allow me to start on the rear axle rebuild and installation of the diff. First piece to be tackled was the wishbone tie.
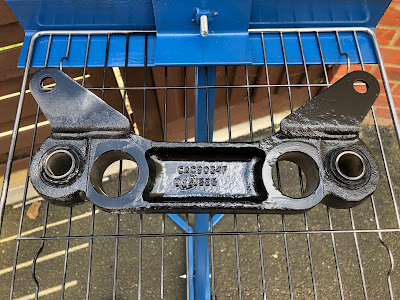
Followers of this blog will recall that I had to obtain a second wishbone tie as the original one was missing a couple of the bushes and that these particular bushes are not available as a replacement part. I spent a lot of time cleaning up the original wishbone tie, as well as the replacement, and now the reason for that effort can be revealed!!
Since the bushes can not be replaced, I was worried about damaging them while pressing them out to enable the wishbone tie to be powder coated. I was also concerned that trying to powder coat the wishbone tie with the bushes in-situ would result in the bushes melting during the curing process! Jon at AK had assured me that I could powder coat with the bushes in place, but I was still a bit nervous and decided to do a trial run on the original tie.
I followed the same process as for the hubs, pre-heat to "degas", degrease and clean, coat and cure. The test was pretty successful although as a result I did make a few adjustments to the process.
 |
| Wishbone Tie - test |
The wishbone tie is a pretty substantial lump of metal and during curing took around 50 minutes for the surface to get up to temperature. Although the bushes didn't melt as I had feared, during the pre-bake and curing there was a pretty distinct smell of hot rubber; as result, for the actual tie, I lowered the temperature for the pre-bake to 200 degrees C and used Satin Black powder from ElectrostaticMagic which only requires 10 minute curing time at the lower temperature of 180 degrees C.
 |
| Wishbone Tie - Final Result |
 |
| Wishbone Tie - close-up of finish |
Next up was the rear pendulum bracket - another substantial chunk of metal casting! Although I have obtained new bushes for this part, I coated it with the satin black powder to match the wishbone tie. In fact I did all the parts for the rear diff in satin black. The process for all these parts was as previously described.
 |
| More sweeping of the drive required... |
 |
| Pendulum after blasting and cleaning |
 |
| Powder coated and reading for curing |
 |
| Fresh out of the oven.. |
 |
| After cooling and removal of masking tape |
 |
| Close-up of finish |
Next up was the rear diff mounting bracket and the compliance buffers (which for the PowerLok differential are solid metal spacers as opposed to the rubber ones for the normal differential units). The donor rear bracket was quite corroded and very pitted in places. It needed some considerable work with the sand blaster, the angle grinder / flappy wheel combo and a dremel to get it cleaned up. I still couldn't quite remove all the pitting though and final finish was not as great as I would have hoped.
 |
| Rear Bracket after some initial grinder / flappy wheel action... |
 |
| Pitting needed a lot of grinding to remove... |
 |
| After blasting and some treatment with the angry end of the Dremel |
 |
| Coated parts for rear diff mounting |
 |
| Some pitting still visible on final coated bracket |
So with all those parts coated I am now in a position to finish off the front hubs and start mounting the rear differential. Just need a wet weekend now then....

No comments:
Post a Comment